
Choose Ana's Biotic Grenade Target Before You Throw
On this page
Choose who needs Ana’s Biotic Grenade before aiming at a group. A nearby teammate under pressure may need it more than several distant enemies. These core-ability decisions apply on PC in Quick Play and Competitive; use your configured controls.
Choose the effect you need
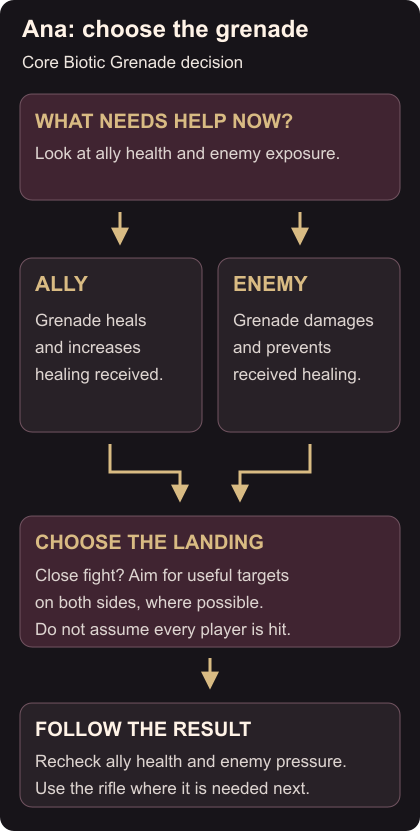
Biotic Grenade heals affected allies and increases the healing they receive. It damages affected enemies and prevents them from receiving healing. Ana’s Biotic Rifle can heal teammates or damage opponents. Ana’s core abilities
Look for the immediate problem: an injured ally, an enemy your teammates can attack, or a close fight where one landing could help on both sides. Pick the landing point to match. If the players move away while you’re aiming, choose again before throwing.
Help an ally under pressure
Aim to land the grenade by the ally who needs health now. Plan to follow with Biotic Rifle healing if they still need it, taking advantage of the increased healing they receive. Biotic Grenade and Rifle
For light damage, consider whether rifle shots can handle it while you keep the grenade available. Under heavy pressure, the immediate heal may matter more than an offensive opportunity. After landing it, watch the ally and the fight instead of staring at the original landing spot.
Give an offensive throw a follow-up
Choose an enemy your team can pressure, ideally beside an attack already happening. A distant opponent behind cover may offer little return. Before throwing, check whether a teammate needs the grenade immediately.
After the hit, watch whether your allies can continue attacking and whether you should return to healing. Healing denial creates an opportunity; it doesn’t guarantee an elimination.
When allies and enemies are close together, aim for useful targets on both sides without assuming the whole group will be affected. Keep the most urgent recipient in mind.
Practise the landing separately
In a quiet custom session with a willing friend, agree on a landing spot. Throw from a chosen position, observe where the grenade arrives, then try another position.
The Mercy movement guide covers support positioning. The Reinhardt Charge guide explains the destination your tank should consider before moving away.